Category: Home Improvement

Shower Faucet Problems That Should Not Be Ignored In Houston Homes
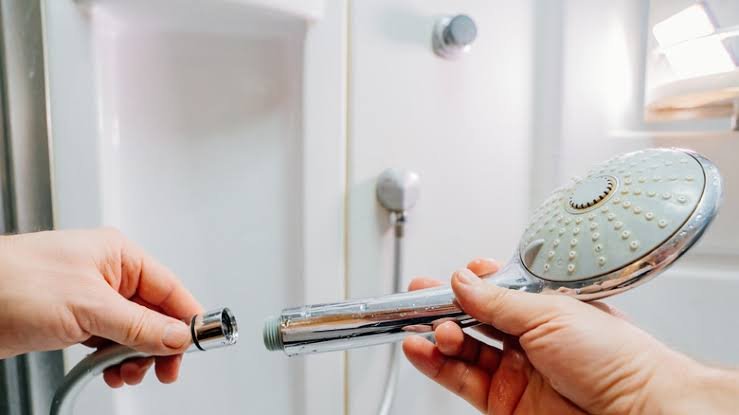
Shower Faucet Problems

A shower faucet is used so routinely that small changes in its performance can be easy to overlook. A minor drip, a handle that feels slightly loose, or a gradual reduction in water pressure may not seem urgent. However, these symptoms can indicate worn components, mineral buildup, damaged seals, or other plumbing problems that may become more complicated over time.

For Houston homeowners, paying attention to shower faucet performance can help prevent unnecessary water waste and damage inside the bathroom. Addressing problems while they are still relatively minor can also make it easier to identify the source before surrounding plumbing components are affected.

A Faucet That Continues To Drip

One of the most recognizable shower faucet problems is persistent dripping after the water has been turned off. A few drops may appear harmless, but a faucet that drips throughout the day can waste a considerable amount of water over time.

Worn washers, seals, cartridges, or valve components are common causes. The exact source depends on the faucet design and its internal parts. Replacing the correct component can often restore normal operation, but an incorrect diagnosis may leave the original problem unresolved.

Homeowners considering shower repair Houston services should pay particular attention when dripping becomes more frequent or continues despite basic maintenance. A professional plumber can inspect the faucet assembly and determine whether an individual component can be replaced or a more extensive repair is appropriate.

Difficulty Controlling Water Temperature

A properly operating shower should allow users to adjust the temperature without unpredictable changes. If the water suddenly becomes too hot or cold while the handle remains in the same position, the faucet or mixing valve may require attention.

Internal cartridges and pressure balancing components help regulate the mixture of hot and cold water. As these components wear out or accumulate deposits, temperature control can become less reliable.

Temperature fluctuations are more than an inconvenience. In households with children or elderly individuals, unexpectedly hot water can pose a safety hazard. Repeated temperature problems should therefore be investigated rather than treated as a normal characteristic of an aging shower.

Low Or Uneven Water Pressure

A noticeable decline in shower pressure may originate from several areas. Mineral deposits can accumulate around the showerhead or within faucet components, restricting water flow. A partially closed valve or worn cartridge can also affect performance.

In some cases, low pressure is not limited to the shower itself. If several fixtures throughout the home experience similar changes, the problem may involve the broader plumbing system.

Homeowners can compare water pressure at nearby sinks and other fixtures. If the shower is the only affected area, attention can be focused on its individual components. A widespread pressure change may justify a more comprehensive plumbing inspection.

Handles That Become Difficult To Operate

Shower handles should move smoothly and remain secure during normal use. A handle that becomes stiff, loose, or difficult to turn can indicate deterioration inside the faucet assembly.

Forcing a resistant handle is rarely a good solution. Excessive pressure may damage the handle, cartridge, stem, or other internal parts. A loose handle can also make accurate temperature and flow adjustments increasingly difficult.

Early inspection may reveal something relatively simple, such as a loose connection or worn component. Waiting until the handle stops functioning completely can make the shower unusable and potentially increase the extent of the required work.

Water Leaking Around The Faucet Or Wall

Visible water around faucet trim deserves immediate attention. While some moisture may simply come from normal shower use, water consistently emerging from behind the handle, trim plate, or wall opening can suggest a plumbing leak.

Leaks concealed behind shower walls can be particularly problematic because they may continue without obvious signs. Over time, moisture can affect drywall, framing, flooring, or nearby finishes. Musty odors, discoloration, peeling paint, or unexplained dampness near the shower can provide additional warning signs.

Finding the actual source is important because replacing surface components alone will not resolve a leak originating behind the wall.

Unusual Sounds During Shower Use

Whistling, rattling, squealing, or vibrating sounds should not automatically be considered normal plumbing noise. These sounds can sometimes result from restricted water flow, worn valves, loose components, or pressure-related issues.

The timing of the sound can provide useful information. For example, noise that occurs only when the handle reaches a particular position may point toward a faucet component. Sounds occurring throughout multiple fixtures could indicate a broader plumbing concern.

Rust, Corrosion, And Visible Deterioration

Faucets operate in an environment that is constantly exposed to moisture. Over time, corrosion can develop on visible or internal components. Surface discoloration may initially appear cosmetic, but significant corrosion can eventually interfere with seals, connections, and normal operation.

Homeowners should also watch for cracks, deteriorated finishes, and recurring moisture around connections. Older faucets may reach a point where replacing several individual components is less practical than installing a new fixture.

Timely Attention Protects The Bathroom

Shower faucet problems rarely improve without intervention. Dripping, inconsistent temperatures, reduced pressure, difficult handles, unusual noises, and leaks can all provide valuable clues about the condition of the fixture and nearby plumbing.

Houston homeowners who respond to these warning signs early may reduce water waste, protect surrounding bathroom materials, and avoid sudden fixture failures. Routine observation and timely professional inspection can keep the shower operating reliably while helping prevent a small faucet problem from developing into a more disruptive plumbing repair.

Home Office Setup Ideas For USA Professionals

Working from home becomes harder when the workspace was created from leftover furniture and an unused corner. Strong home office setup decisions support concentration, comfort, storage, privacy, and the type of work you complete each day.

A professional workspace does not need a separate room. Many American homes rely on a bedroom corner, dining area, basement section, or converted closet. The goal is to give work a defined location while protecting the rest of the home from cables, papers, equipment, and unfinished tasks.

Begin by reviewing your normal schedule. Video meetings require a different layout from design work, accounting, writing, customer service, or project management. Count the devices you use, study available daylight, and note where household noise appears during working hours.

Professionals comparing furniture assembly, electrical support, or household service categories may find planning ideas through regional home improvement listings. Local providers should still be checked for experience and work suited to the property.

A useful office should make starting easier in the morning and shutting down simpler at the end of the day.

Home Office Setup Built Around Daily Work

A workspace should match the tasks performed most often. Copying a stylish office without considering routine can create an attractive room that feels uncomfortable after several hours.

Position The Desk According To Work Needs

Desk placement affects light, background appearance, movement, and concentration.

Facing a window may provide a pleasant view, but direct sunlight can create screen glare. Placing the desk perpendicular to the window often brings daylight from the side while keeping the screen easier to see.

Video meetings need a calm background. A wall, bookcase, curtain, or simple storage unit may provide better visual order than an open doorway.

Keep enough space behind the chair for movement. A desk pressed into a narrow corner may become frustrating when drawers cannot open or cables collect around the feet.

A professional using two monitors may need a deeper desk than someone working mainly from a laptop. Measure equipment before buying furniture.

The less obvious lesson is that the largest desk is not always the best choice. A smaller surface with clear storage may reduce clutter and keep priority work visible.

Separate Work From Household Traffic

Choose an area that avoids the busiest routes when possible.

A desk beside the kitchen may provide space, yet noise and movement can interrupt meetings and focused tasks. A quieter bedroom corner may work better when the layout supports separation.

Use furniture placement to create a boundary. A bookcase, curtain, rug, or console can define the work zone without building walls.

Keep household items out of office storage. Mixing school papers, mail, tools, and work documents makes both systems harder to manage.

Professionals exploring local furniture, organization, or property support may browse household service categories while comparing nearby options.

The office boundary should remain easy to understand. When work expands across several rooms, shutting down becomes harder.

Improve Comfort For Long Working Hours

Comfort should support steady work without encouraging poor posture or unnecessary movement. Furniture needs to fit the user rather than follow one standard arrangement.

Choose A Chair And Desk That Work Together

Seat height, desk height, screen position, and keyboard placement affect the full workstation.

A chair should support a comfortable sitting position while allowing feet to rest securely. A foot support may help when the desk cannot be adjusted.

Keep the keyboard and mouse close enough that shoulders remain relaxed.

Screens should sit where the user can read them without repeatedly bending the neck. Laptop users may benefit from a separate keyboard and pointing device when the computer is raised.

A polished chair does not guarantee comfort. Test seat depth, back support, arm position, and adjustment range.

The counterintuitive point is that frequent movement may matter more than finding one perfect sitting position. A strong workstation allows changes throughout the day.

Add Lighting For Screens And Paperwork

General room lighting may leave the desk too dark.

Use focused light for reading, writing, and detailed tasks. Position it to reduce glare on screens.

Daylight can improve the room, but blinds or curtains may be needed during strong sun.

Keep bulb appearance connected with the rest of the workspace. Uneven lighting can make long sessions tiring.

A regional electrical and household directory may help professionals identify local categories connected with lighting, wiring, furniture, or property work.

The strongest lighting plan supports both daytime and evening work. One setting may not suit every hour.

Control Cables, Papers, And Equipment

Visual clutter can make work feel unfinished before the day begins. Storage should keep active materials accessible while moving occasional supplies away from the desk.

Give Every Cable A Clear Route

List the equipment connected to power and data.

Place the desk near suitable outlets when possible. Avoid creating long cable paths across walking areas.

Use clips, trays, sleeves, or channels to keep cords grouped and supported.

Label similar chargers so equipment remains easy to identify.

Leave enough slack for normal movement without allowing cables to collect on the floor.

A standing desk needs cable planning through its full range of motion. Test movement before final placement.

The unexpected benefit of cable control is easier cleaning. A clear floor reduces dust buildup and protects equipment.

Store Papers According To Action

Separate active work from records and supplies.

Keep current projects within reach. Move completed documents to closed storage or another suitable location.

Use broad categories rather than many small folders.

A small tray can hold items requiring action. Empty it on a regular schedule so it does not become permanent storage.

Professionals researching local organization, furniture, or office support may review regional business and household listings before checking nearby providers.

Do not keep every document on the desk because it may be needed later. Visibility should reflect priority.

Support Focus And A Clear End To The Day

A home office works better when it helps the mind recognize when work begins and ends.

Reduce Avoidable Interruptions

Keep frequently used supplies near the desk.

Use headphones, curtains, soft furnishings, or door placement to reduce distracting sound where suitable.

Set household expectations around meetings and focus periods.

Place personal devices where they do not compete for attention.

Keep only current work visible.

A simple background can improve concentration because fewer objects compete for attention.

The less obvious improvement may be moving the office farther from household storage. Repeated trips through the work area can interrupt concentration even when nobody speaks.

Create A Shutdown Routine

Close documents, clear the desk, return supplies, and review the next day’s first task.

Turn off equipment that does not need to remain active.

Move cups and household items out of the office.

Use a cabinet, screen, or closed laptop to create a visible end to work.

A short shutdown routine protects the rest of the evening. It also makes the next morning easier because the workspace begins in order.

Conclusion

A professional workspace should support concentration without taking over the home. Desk placement, lighting, comfort, storage, and clear boundaries matter more than decorative trends.

A practical home office setup begins with the work you perform each day. Position furniture around equipment, meetings, daylight, and household movement rather than copying a layout designed for another routine.

Keep cables controlled, active papers visible, and occasional supplies away from the main work surface. Build small movement breaks into the day and create a clear shutdown routine.

The strongest office feels easy to enter, comfortable to use, and simple to leave behind when work ends.

Frequently Asked Questions

Where should a home office desk be placed?

Choose a position with useful daylight, limited glare, clear movement, suitable outlets, and a calm background for meetings.

Can a bedroom include a professional workspace?

Yes. Use furniture, rugs, curtains, or storage to create a clear boundary and keep work materials contained.

How large should a home office desk be?

Size depends on monitors, equipment, paperwork, and available space. Measure the complete workstation before buying.

What lighting works best for remote work?

Combine daylight, general room lighting, and focused desk light. Position fixtures to reduce shadows and screen glare.

How can home office cables be hidden?

Use trays, clips, sleeves, channels, and furniture placement. Keep cables away from walking paths and allow safe movement.

Is a standing desk necessary for working from home?

No. It may help some users change position, but regular movement can also be supported with a suitable seated workstation.

How can a home office feel separate from family space?

Use a defined location, clear storage, visual boundaries, household expectations, and a regular shutdown routine.

What should remain on a professional desk?

Keep current equipment, active work, useful lighting, and a limited number of daily supplies. Move occasional items elsewhere.

Categories: Home Improvement

Effective Steps to Maintain Roof Shingle Health

Keeping your roof shingles in top condition isn’t just about aesthetic appeal; it’s a critical part of protecting your home’s integrity and value. From my 15+ years leading property management and maintenance projects, I’ve learned that proactive, targeted efforts make all the difference. A well-maintained roof not only extends its lifespan but also saves you substantial costs down the line. Here, I’ll share practical, proven strategies to effectively maintain roof shingle health, ensuring your roof continues to serve its vital function for years to come.

Regular Roof Inspections Are Key

Routine inspections are fundamental for early detection of potential issues. At least twice a year, remove debris, inspect for loose or damaged shingles, and look for signs of wear or moss growth. These visual checks help catch problems before they escalate, saving you costly repairs. In my experience, many homeowners overlook the importance of scheduled inspections, which often leads to roof failures that could be avoided. During inspection, also assess flashing and gutters to ensure they’re functioning correctly, preventing water infiltration that weakens shingles over time. For a reliable inspection routine, consider consulting local experts who understand regional weather impacts.

Clean Your Roof and Gutters Regularly

Standing debris, moss, and algae can accelerate shingle deterioration. Regular cleaning extends your roof’s lifespan and maintains its appearance. Use a soft-bristle brush or low-pressure washer to gently remove moss and algae without damaging the shingles. Additionally, cleaning gutters ensures proper water drainage and prevents water from backing up onto your roof, where it can cause leaks. Moss tends to thrive in damp, shaded areas—trimming trees around your roof can mitigate this problem. For expert guidance on cleaning techniques and products, sites like WisconsinPRIndex offer valuable tips for maintaining outdoor property features effectively.

Address Repairs Promptly

Delaying repairs can lead to more extensive damage and higher costs. Whether it’s a missing shingle, a crack, or warped flashing, fix these issues as soon as they’re noticed. Small issues, if left unattended, weaken the roof’s protective layer, allowing moisture to seep through. In my experience, quick action on minor repairs often prevents costly replacements later. Always work with reputable roofing contractors to ensure proper repair techniques. Regularly reviewing your roof’s condition helps catch these problems early and maintain optimal shingle health, especially during seasonal changes or after severe weather events.

Choose Quality Materials and Proper Installation

Investment in high-quality shingles is proven to improve durability. When replacing or upgrading, opt for products designed for your specific climate conditions, whether that’s wind resistance or UV protection. Proper installation is equally critical—poorly installed shingles are prone to early failure. Working with experienced certified professionals guarantees your roof’s longevity. Over the years, I’ve witnessed that cutting corners here backfires; the initial savings are dwarfed by future repair expenses. Additionally, some regions, such as New Jersey or Virginia, have specific regulations that impact the best materials to use, making expert advice invaluable.

Monitor Weather Conditions and Protect Your Roof

Weather events can severely impact shingle health—hail, high winds, and heavy rain are especially damaging. During forecasts of storms, ensure gutters are clear and that loose shingles or flashing are secured. Covering vulnerable areas with protective materials can also provide extra resilience. Post-storm inspections are essential for assessing damage and preventing leaks. From my experience, proactive measures like trimming trees that can fall on your roof during storms are often overlooked but can be game changers in minimizing damage.

Conclusion

Maintaining roof shingle health is an ongoing process that demands a strategic approach rooted in regular inspections, timely repairs, and quality materials. Being proactive rather than reactive saves money and preserves property value. Employ these practical steps, and you’ll extend the service life of your roof, protecting your investment through seasons of weather and time. Remember, the effort invested here is what keeps your home safe and sound for the long haul.

FAQs

How often should I inspect my roof shingles?

You should inspect your roof at least twice a year, ideally in spring and fall, and after major storms to catch issues early.

What are some signs of roof shingle damage?

Look for missing shingles, curling edges, granule loss, moss growth, or leaks inside your home—their presence indicates potential problems.

Should I hire a professional for roof maintenance?

Yes, especially for inspections and repairs involving difficult or high areas, professional assessment ensures thorough and safe maintenance.

How can I prevent moss and algae from growing on my roof?

Regular cleaning and trimming nearby trees that cast shade can reduce moisture build-up that encourages moss growth.

What types of shingles are most durable?

Architectural style shingles made from asphalt or composite are among the most durable, especially when properly installed for your regional climate.

Categories: Home Improvement

Best Techniques to Replace Broken Floor Tiles

Replacing broken floor tiles seems straightforward, but in my 15 years working in facility management and property maintenance, I’ve learned it’s more nuanced. The reality is, what you do right after you notice cracked or shattered floor tiles can save you time, money, and headaches down the road. Many people treat tile replacement like a quick fix, only to deal with loose tiles, grout issues, or mismatched surfaces later.

Here’s what works when replacing broken floor tiles — tried and tested in real projects, with a few mistakes behind me. Whether you’re managing a high-traffic commercial space or renovating a cozy home, these techniques are key to a lasting, professional feel.

Assess the Damage and Select Matching Tiles

Before you grab a hammer, take a good look at the damaged tiles. The bottom line is understanding the extent of damage helps prevent surprise costs or future repairs. I once worked with a client who replaced just one broken tile, only to find that several surrounding tiles also had hairline cracks that eventually spread.

If you don’t have the original tile on-hand, find replacements that closely match the color, pattern, and size. In my experience, this step is critical — even slight variations in tile thickness or tint throw off the entire floor’s look and feel. Use resources like specialized tile suppliers or websites to find close matches. For instance, browsing platforms like DMC Insider can help you source a wide range of tiles matching your needs.

Carefully Remove the Broken Tile Without Damaging Surrounding Tiles

Removing broken tiles cleanly is a skill that separates quick fixes from costly mistakes. The reality is, rushing this step can crack adjacent tiles or ruin the subfloor. Use a grout saw or oscillating tool to cut through the grout around the damaged tile carefully.

I’ve seen teams try a hammer and chisel right away, but that backfired — it led to jagged edges and replaced tiles not sitting flush. Instead, leverage precision tools and patience. Protecting the integrity of the surrounding tiles saves time and money, avoiding an unnecessarily large repair area.

Prepare the Surface for New Tile Installation

The prep work underneath the tile is where many replacements fail. I’ve encountered floors where installers skipped cleaning or leveling the subfloor — the new tile never fully adhered and popped loose in a few months. Taking time to scrape old adhesive, clean all debris, and level the surface is crucial.

From a practical standpoint, this is where failures happen most often. The floor should be dry and flat; any dip or residue affects the lifespan of your repair. Using a self-leveling compound may be necessary, especially on uneven or older floors.

Apply Adhesive Properly and Set the New Tile

One lesson I learned the hard way — adhesive quality and technique matter enormously. When applying mortar or adhesive, go for a consistent, even layer that covers the entire backing of the tile. Avoid thick blobs or thin spots.

Set the tile firmly but don’t force it down unevenly. Using spacers ensures alignment and consistent grout lines. During a project in 2018, we saw roughly 3-5% reduction in rework when teams adhered strictly to adhesive protocols. This step ties everything together and is often overlooked outside professional circles.

Grout and Seal the New Floor Tiles Thoroughly

Grouting may seem like the final touch, but skipping proper sealing puts your repair at risk from stains and moisture penetration. After grout sets, sealing creates a durable barrier that extends the tile repair’s lifespan. Lack of sealing played a big role in a failure I witnessed — the grout discolored, and tiles started loosening prematurely.

I recommend using a penetrating sealer and reapplying it annually in high-traffic or moist environments. Also, avoid spreading grout over tiles excessively; clean promptly with damp cloths to prevent residue buildup.

Conclusion

Look, the bottom line is replacing broken floor tiles isn’t just about swapping one tile for another. From assessing the damage and carefully removing old tiles to prepping surfaces, applying adhesive, and properly grouting and sealing — you need a methodical approach to get the results that last. What I’ve learned is skipping even one step can cause problems down the line, leading to wasted money and downtime. When done right, tile replacement preserves your floor’s integrity and aesthetics, helping avoid more costly overhauls later. For more insights on home and facility maintenance tips, check out First Indian Paper’s home improvement guides

What are the best tools to replace broken floor tiles?

Using the right tools like a grout saw, oscillating multi-tool, chisel, hammer, notched trowel, and tile spacers makes the process efficient and prevents damage. Precision tools help remove tiles cleanly, prepare the surface, and set new tiles uniformly.

How do I ensure new tiles match the existing floor design?

Find original tiles or look for replacements with matching color, size, material, and thickness. Use tile supplier websites or local stores specializing in discontinued or specialty tiles. Bringing a tile sample helps with accurate color matching.

Can I replace broken tiles myself or should I hire a professional?

DIY tile replacement is possible for small repairs if you have basic skills and tools. However, large areas or complex tile patterns often require professional expertise to avoid mistakes and ensure durability.

How long does it take for adhesive and grout to cure before use?

Typically, mortar adhesive cures within 24 hours, and grout takes about 48-72 hours to fully set. Avoid heavy foot traffic during this period to prevent shifting and cracking.

What common mistakes should be avoided when replacing floor tiles?

Rushing tile removal, skipping surface prep, using poor-quality adhesive, improper tile alignment, and not sealing grout afterward are frequent errors. These lead to uneven floors, loose tiles, and grout discoloration.

If you’re interested in liability concerns during DIY projects or contractor work, a resource like Injury Lawyers Hub covers important legal considerations.

Categories: Home Improvement

Why Your Upholstery Needs Extra Care In Sunny, Active Living Environments?

Homes filled with natural light and daily activity feel lively, warm, and welcoming. Sunlit rooms create a bright atmosphere, while active spaces encourage comfort and togetherness. However, these same environments can place extra stress on upholstered furniture. Sofas, chairs, cushions, and decorative fabrics are continually exposed to sunlight, movement, spills, and frequent use. Without proper care, this daily wear can gradually fade colors, weaken fibers, and reduce the overall beauty and comfort of your furnishings. Furniture can survive continuous sunlight and everyday family activities without losing its attractiveness when Ultra-Guard Fabric Protection is added to your upholstery care regimen. Understanding how to care for upholstery in an active, sunny home is essential for keeping it looking inviting for years. 

The Impact Of Sunlight On Upholstery

One of the most important elements influencing upholstery in light-filled living areas is sunlight. While natural light enhances the ambiance of a room, it also contains ultraviolet rays that can fade fabric dyes and weaken material strength. Over time, the original richness of fabric can diminish, leaving the sofa or chair looking tired or uneven in color.

This fading does not happen overnight. It occurs slowly, making it easy to overlook until the change becomes obvious. Protecting upholstery from constant direct sunlight can help preserve its appearance. Simple adjustments such as repositioning furniture, using sheer curtains, or selecting sun-resistant fabrics can significantly reduce fading.

Daily Activity Brings More Wear And Tear

Active homes are full of motion. Kids climbing, pets lounging, guests sitting or resting their feet, and everyday use all contribute to fabric friction. This continuous contact gradually compresses cushion fillings, smooths fabric texture, and loosens the weave of upholstery fibers. High-use spots, such as the center of a sofa or an armrest, often show signs of wear sooner than less-frequently used areas.

Gentle, consistent care helps manage these effects. Rotating cushions, flipping them when possible, and encouraging even use across seating areas can keep furniture looking balanced and reduce premature wear.

Spills And Stains Are More Frequent In Busy Spaces

Homes where people relax, eat, gather, and play are more likely to experience spills. Beverages, snacks, pet accidents, and daily messes can quickly penetrate upholstery fibers if left unaddressed. Once absorbed, stains can be tough to remove completely, especially on lighter fabrics.

Preventing stains starts with quick action. Blot spills gently with a soft cloth to absorb liquid before it settles. Avoid rubbing, as this pushes the substance deeper into the fabric. Using protective treatments on upholstery can also help liquids remain on the surface for longer, lowering the possibility of lasting stains and simplifying cleanup. 

Pets Add Extra Considerations

Pets bring joy, but they also bring fur, oils, dirt, and occasional scratches. Upholstery in pet-friendly homes needs additional care to stay fresh and clean. Regular vacuuming helps remove loose fur, while grooming pets reduces shedding and skin oils transferring to furniture. Using washable throws in pet-favorite spots can protect fabric from daily wear.

For households with cats or dogs, selecting tightly woven fabrics and smooth textures can make upkeep simpler and prolong furniture life.

Maintaining Freshness In Warm And Sunny Climates

Warm environments often come with higher humidity. Moisture in the air can settle into upholstered furniture, leading to musty odors or gradual fabric weakening. Keeping indoor spaces well ventilated and using fans or air conditioning can help prevent this.

Additionally, vacuuming upholstery regularly helps remove dust and airborne particles that may otherwise accumulate and contribute to a stale smell or fabric breakdown.

Building An Upholstery Care Routine

A consistent care routine supports long-lasting beauty and comfort.

  • Vacuum upholstery weekly to remove dust and grit.
  • Blot spills immediately instead of letting them soak.
  • Rotate cushions to promote even wear.
  • Limit direct sunlight exposure where possible.
  • Use washable throws in high-activity or pet areas.

Establishing these small habits can protect your furniture and maintain a clean, welcoming living environment.

Final Thoughts

Sunny, active living spaces are joyful and full of life, but they require thoughtful care to keep upholstery looking its best. Sunlight, daily movement, spills, and humidity can all take a toll on fabrics over time. By understanding these challenges and adopting simple maintenance strategies, homeowners can preserve the beauty, comfort, and quality of their furniture for many years. A little extra attention goes a long way in maintaining a space that feels inviting, warm, and always ready to enjoy. 

Categories: Home Improvement

How To Choose A Trustworthy Plumbing Company In Jersey Village, TX?

As soon as a plumbing issue such as a broken pipe, clogged drain, or leaky faucet occurs, you shouldn’t worry about who you choose for plumbing services. Knowing who can be trusted ensures the work gets completed accurately, quickly, and fairly. Jersey Village, Texas, boasts numerous plumbing firms, but how can you know who will best meet your needs? When making your selection, keep these key considerations in mind:

1. Look For A Licensed And Insured Plumber

Be certain that any plumbing company in jersey village, TX you consider hiring is both licensed and insured. In Texas, plumbers require a license from the Texas State Board of Plumbing Examiners; its possession ensures they possess all of the knowledge and understanding needed to manage plumbing problems safely and efficiently. A reliable business should gladly present proof of its licensure upon request from customers.

An ethical plumbing business will carry appropriate insurance. Plumbing can be dangerous work, and even highly experienced plumbers may experience accidents during installation work; having coverage protects homeowners against legal responsibility in case something goes amiss during this process; without it in place, should accidents or injuries happen on your property – without it, they could potentially hold you liable –

2. Check For Experience And Reputation

In terms of plumbing services, experience is invaluable. A long-running company will likely have an established name and solid track record when it comes to providing high-quality services; selecting one with plenty of experience would likely prove more prudent; although newer businesses could provide excellent services too. Skilled plumbers have extensive knowledge in handling simple fixes to complex installations – often providing answers less experienced businesses would overlook.

Reputation is also key when searching for plumbing companies in Jersey Village, Texas. Seek referrals from friends or neighbors as well as read online reviews such as those found on Google or Yelp to gain valuable insight into a firm’s dependability, quality of work, and customer service; make a note of both positive and negative comments for an accurate reflection of what to expect when hiring one of these services.

3. Evaluate Their Customer Service

Customer service must always take precedence at a dependable plumbing business, taking your needs and requirements seriously from the moment you contact them. Qualified plumbers should have representatives available who are trained at quickly answering inquiries, setting appointments quickly and handling any potential problems you might be having quickly and professionally.

When calling a company and they seem unwilling or reticent to give you what information you require, that should be taken as an early red flag. A trustworthy organization should always be transparent with costs, services, completion dates, and costs, as well as provide experienced plumbers who are happy to explain exactly what work needs doing at home. If this occurs, then a skilled, courteous plumber who clearly communicates their work should arrive for an inspection or installation at home as quickly as possible and explain their plan clearly should also arrive as planned.

4. Get Multiple Quotes

Since plumbing services may range in cost, it’s best to gather estimates from multiple businesses before selecting one as your service provider. While cheaper offers might not always be better options, comparing costs is critical in making an informed decision and not overspending on services that don’t warrant it. Companies offering too-cheap prices without properly analyzing an issue should be avoided as they could provide false estimates in order to gain entry and then raise prices once work begins.

Once a reliable plumbing company inspects the problem, they should give an honest and up-front estimate, outlining all expenses–labor, supplies and any fees–for your consideration. It may be wiser to seek another quote should any firm appear unwilling or pressure you into making decisions quickly.

5. Consider Their Availability And Response Time

It is crucial that plumbing issues can arise at any time. A plumbing company in Jersey Village, Texas, that offers prompt emergency service will make a valuable addition. A trustworthy business should always be available around the clock, whether that means broken pipe repairs on weeknights or blocked sewage lines over weekends.

Pay attention to how quickly they answer the phone and if they appear eager to arrange an appointment immediately when you contact them. A business that prioritizes customer convenience quickly may be reliable when emergencies arise, giving fast responses when needed.

6. Ask About Warranties

Finally, when searching for reliable plumbing businesses it’s essential to inquire about warranties on labor and parts used during installation or repairs. A guarantee from these services ensures they will return free-of-charge should anything go amis with their work after it has been finished – an indication of customer service excellence from them and confidence in the caliber of their workmanship.

Conclusion

Finding a trustworthy plumbing company in Jersey Village, Texas, requires more than simply choosing the first company you find. Considerations such as availability, reputation, expertise license, and customer service will assist in selecting a reputable business offering top-quality services at reasonable rates – this effort should ultimately pay dividends! Take your time in researching before selecting one! An exceptional plumber will ultimately be worth their cost, so don’t be intimidated by spending some extra time doing research beforehand!

Categories: Home Improvement

The Ultimate Guide to Water Extraction and Damage Recovery

Burst pipes, flooding, and leaking roofs all cause disastrous water damage. Water damage from prolonged sitting can cause mold growth, structural deterioration, and pricey repairs. That’s why water extraction and damage recovery should be handled as quickly as possible. Professional services from a reputable water removal company can assist in minimizing damage and bring your house or business back to its former state. 

In this guide, we’ll explore the essential steps of water extraction, the importance of swift action, and how professionals ensure thorough damage recovery.

Step 1: Immediate Action to Minimize Damage

The first 24 to 48 hours after water exposure are critical. Acting quickly helps to stop more damage and lower the restoration expenses. 

What You Should Do Immediately:

  • Turn Off the Water Source – If a burst pipe is the cause, shut off the main water supply.
  • Unplug Electrical Appliances – Water and electricity are a dangerous combination. Turn off the power in affected areas.
  • Remove Valuable Items – Move furniture, rugs, and electronics to a dry location.
  • Call a Professional Water Removal Company – Experts have the tools and experience to extract water quickly and prevent long-term issues.

Step 2: Water Extraction Process

Once professionals arrive, they begin the water extraction process using industrial-grade equipment.

Methods Used in Water Extraction:

  • Pumps and Vacuums – High-powered pumps remove standing water quickly.
  • Dehumidifiers and Air Movers – These devices help dry out carpets, walls, and furniture.
  • Moisture Meters – Used to detect hidden moisture in walls and flooring.

Proper water extraction is crucial to preventing mold growth and further structural damage.

Step 3: Drying and Dehumidification

Even after visible water is removed, moisture can linger in walls, insulation, and subflooring. A thorough drying process ensures the area is completely moisture-free.

Why This Step Matters:

  • Prevents mold growth, which can develop within 24 hours.
  • Reduces the risk of wood rot and drywall deterioration.
  • Improves air quality by eliminating excess humidity.

Professional drying techniques, including high-powered fans and dehumidifiers, speed up this process to prevent additional damage.

Step 4: Cleaning and Sanitization

Floodwater and standing water can bring contaminants, bacteria, and foul odors. Once drying is complete, the affected area must be cleaned and disinfected.

Steps in Cleaning & Sanitization:

  • Removing Debris – Water can carry dirt, sewage, and other contaminants.
  • Deep Cleaning Carpets & Upholstery – If salvageable, these are professionally cleaned and deodorized.
  • Applying Antimicrobial Treatments – These prevent bacteria and mold from forming.

Step 5: Structural Repairs and Restoration

Water damage often weakens structural elements, leading to the need for repairs. Restoring the damage depends on its extent; it may include: 

  • Replacing damaged drywall, flooring, or insulation
  • Fixing warped wooden structures
  • Repairing leaks in roofs or walls
  • Restoring painted or wallpapered surfaces

A full-service water removal company will not only extract water but also handle reconstruction, ensuring your space is safe and fully restored.

Preventing Future Water Damage

Once your home or business is restored, it’s important to take measures to prevent future water damage.

Tips for Water Damage Prevention:

  • Inspect Pipes Regularly – Look for leaks or corrosion in your plumbing system.
  • Maintain Gutters and Downspouts – Clear debris to ensure proper drainage.
  • Invest in a Sump Pump – This device helps remove excess water in basements.
  • Seal Cracks in Foundations – Prevent water from seeping into your home’s structure.
  • Monitor Appliances – Check washing machines, dishwashers, and water heaters for leaks.

Final Thoughts

If mishandled, water damage can rapidly become a major issue. The key to effective damage recovery is swift action, thorough water extraction, and professional restoration. Hiring a reputable water removal company ensures that every step—from water removal to structural repairs—is completed efficiently and safely.

By understanding the process and taking preventative measures, you can protect your home or business from future water-related disasters. If you experience water damage, don’t wait—seek professional assistance immediately to prevent long-term issues.

Categories: Home Improvement

How Dehumidification Protects Your Home After A Flood

Floods can wreak havoc on a home, causing visible and hidden damage that requires immediate attention. While extracting standing water is the first step, the restoration process doesn’t stop there. Excess moisture lingering in the air and materials can lead to serious issues if not addressed promptly. Dehumidification is a critical component of flood damage restoration, ensuring your home is fully dried, safe, and habitable.

The Importance of Dehumidification After a Flood

Floods saturate not only visible surfaces but also the air, walls, floors, and even hidden cavities. This residual moisture can lead to several long-term problems, including:

  1. Mold Growth:

Mold spores spread quickly and pose health risks, particularly to individuals with allergies, asthma, or weakened immune systems. Proper dehumidification removes the moisture mold needs to survive, significantly reducing the risk of infestations.

  1. Structural Weakness:

Materials such as wood, drywall, and insulation absorb water during a flood. Over time, this can cause the structure to bend, rot, or even fall apart. Dehumidification helps dry these materials thoroughly, preserving the structural integrity of your home.

  1. Lingering Odors:

Floods often leave behind musty smells caused by trapped moisture. Dehumidification eliminates excess humidity, helping to neutralize unpleasant odors and improve air quality.

  1. Pest Infestations:

Damp environments attract pests like termites and rodents. By maintaining low humidity levels, dehumidification makes your home less inviting to these unwelcome guests.

How Dehumidification Works in Flood Damage Restoration

Dehumidification is the process of removing moisture from the air and materials in an affected area. During flood damage restoration, professional-grade equipment is used to ensure effective and efficient drying. Here’s how it works:

  1. Initial Assessment:
    Restoration professionals assess the extent of the flood damage and measure humidity levels using tools like hygrometers and moisture meters. This step determines the type and number of dehumidifiers needed.
  2. Equipment Placement:
    Industrial-grade dehumidifiers are strategically placed in affected areas. These machines extract moisture from the air, reducing the overall humidity levels and speeding up the drying process.
  3. Air Circulation:
    Air movers or fans are often used in conjunction with dehumidifiers to promote airflow and prevent moisture from settling in hard-to-reach areas.
  4. Continuous Monitoring:
    Throughout the process, professionals monitor humidity levels and adjust equipment settings as needed to achieve optimal results.

Types of Dehumidifiers Used in Restoration

Several types of dehumidifiers are used in flood damage restoration, each suited to specific conditions:

  1. Refrigerant Dehumidifiers:
    These are the ones that happen most often during floods. They cool the air, which makes water droplets condense and gather in a tank. When it’s warm and muggy, refrigerant dehumidifiers work well.
  2. Desiccant Dehumidifiers:
    Desiccant dehumidifiers use chemical absorbents to extract moisture from the air. They work great in cold places and for drying things like concrete that don’t have much water in them.
  3. Low-Grain Refrigerant (LGR) Dehumidifiers:
    LGR dehumidifiers are advanced models that can extract moisture even in extreme conditions, making them perfect for large-scale restoration projects.

The Benefits of Professional Dehumidification

If you try to fix flood damage on your own, you might not dry it completely and make mistakes that cost a lot of money. Professional dehumidification offers several advantages:

  • Thorough Drying: Restoration experts use specialized equipment to ensure no moisture is left behind, even in hidden areas like wall cavities and subfloors.
  • Speed and Efficiency: Professional-grade dehumidifiers work faster than consumer models, reducing the time needed to restore your home.
  • Prevention of Secondary Damage: Proper dehumidification prevents issues such as mold growth, structural damage, and pest infestations.

Steps to Prevent Moisture Issues After a Flood

While dehumidification is essential, taking preventative measures can minimize the impact of future floods:

  1. Seal Entry Points: Ensure doors, windows, and foundation cracks are properly sealed to prevent water from entering.
  2. Install a Sump Pump: During a flood, a sump pump can help get rid of extra water in your basement.
  3. Maintain Gutters and Downspouts: Proper drainage directs rainwater away from your home, reducing the risk of flooding.

Conclusion

Dehumidification is a cornerstone of effective flood damage restoration, protecting your home from the long-term consequences of excess moisture. From preventing mold growth to preserving structural integrity, this process ensures your home is restored to a safe and livable condition. For homeowners dealing with the aftermath of a flood, enlisting professional restoration services with advanced dehumidification equipment is the best way to safeguard your property and health.

Categories: Home Improvement

Stay Warm This Winter: Furnace Repair Tips For Denver Homeowners

Homeowners in Denver mainly depend on their furnaces to keep their homes warm and cozy as winter draws near. With the temperature dropping significantly, the last thing anyone wants is a furnace breakdown in the middle of a chilly night. To avoid unexpected issues, it’s essential to stay proactive about furnace repair in Denver. Here are some practical tips to help Denver homeowners keep their furnaces in top shape throughout the winter season.

Recognizing Early Signs Of Furnace Trouble

One of the keys to preventing major furnace problems is identifying issues early. Common warning signs include inconsistent heating, unusual noises, and a sudden increase in energy bills. If you notice rooms in your home are colder than others despite the thermostat being set properly, your furnace may be struggling to distribute heat effectively. Strange sounds like banging, clanging, or whistling could indicate mechanical issues, while skyrocketing utility bills may point to an inefficient system. Addressing these signs promptly can save you from costly repairs later.

Regular Maintenance Is Non-Negotiable

The foundation of a properly operating furnace is routine maintenance. Denver homeowners should aim to schedule a professional inspection and tune-up annually, preferably before winter sets in. A technician will clean important parts, look for wear and tear, and make sure the system is functioning properly during this service. In addition to extending the furnace’s lifespan, routine maintenance guarantees safe operation and lowers the possibility of fire dangers or carbon monoxide leakage.

Replace Or Clean Air Filters

A clogged air filter is a common cause of furnace inefficiency. Filters trap dust, debris, and allergens, preventing them from circulating through your home. But as time passes, these filters get clogged and impede airflow, making your furnace work harder than it has to. Homeowners should check their furnace filters monthly and replace them as needed, especially during peak usage in the winter. Clean filters make your house more comfortable and economical to heat by enhancing air quality and lowering energy use. 

Check And Adjust Your Thermostat

Sometimes, furnace problems aren’t with the furnace itself but with the thermostat. Make sure the heating mode and temperature on your thermostat are set correctly. For Denver’s fluctuating winter weather, consider investing in a programmable thermostat. This allows you to create a heating schedule that matches your daily routine, reducing strain on your furnace and lowering your energy bills. If the thermostat doesn’t respond as expected, check the batteries or consult a technician to see if it needs repair or replacement.

Clear Obstructions Around Vents And The Furnace

For optimal performance, make sure vents, registers, and the area around your furnace are free from obstructions. Furniture, rugs, or curtains blocking vents can disrupt airflow, causing uneven heating in your home. Additionally, the furnace itself needs adequate space to draw in air and operate efficiently. Clearing the area around it also reduces the risk of fire hazards.

When To Call A Professional?

While some maintenance tasks are manageable for homeowners, certain issues require professional attention. If your furnace isn’t turning on, fails to maintain a steady temperature, or emits a burning smell, it’s time to call an expert. Denver’s cold winters can exacerbate furnace problems, so it’s crucial to address them as soon as possible. A skilled specialist can identify and fix complicated problems, guaranteeing the security and dependability of your system. 

Upgrading An Aging Furnace

If your furnace is more than 15 years old, frequent repairs might indicate it’s time for a replacement. Modern furnaces are significantly more energy-efficient, which can save you money on heating costs in the long run. Denver homeowners should consult a trusted HVAC professional to evaluate their current system and recommend suitable upgrades if needed. Investing in a new furnace before your old one fails ensures you’re prepared for the winter without interruptions.

Final Thoughts

Denver winters demand a reliable heating system, and taking proactive steps can ensure your furnace operates smoothly throughout the season. Regular maintenance, timely repairs, and paying attention to warning signs are the best ways to keep your home warm and safe. By following these tips, Denver homeowners can enjoy a cozy and comfortable winter without the stress of unexpected furnace breakdowns.

Categories: Home Improvement

Top Reasons To Purchase Furniture For Designing Your Home

Furniture is the foundation of a home. Without it, your home will feel empty. You can’t give your home the perfect look without the right furniture. There are several things to consider before you buy furniture. There are many reasons furniture can be purchased. As we grow and have families, our furniture needs to change. For comfortable living, furniture is needed in many ways. It can be used to store, organize, or create a decor.

No matter how big or small your house is, furniture can help you define it. A quality piece of furniture can make a house look complete. We will discuss the various reasons you should buy furniture for designing your home.

The House Look

Since the beginning, furniture has played an important role in ensuring that the interior of a home is functional and well-designed. The right furniture can give your home the right look. These are some key tips for choosing the right furniture to decorate your home.

Sofa Sets

The living space is the area where you can put the right chaise set that matches the interior color and decor. There are many sofa options available, including leather sofas, wooden sofas, leatherette sofas, and fabric sofas. The sofas become the centerpiece of the living space and welcome guests to the area. A dark sofa set can be placed in a living room with a backdrop of light.

Coffee Tables Modern Coffee Tables

Indian homes are increasingly embracing coffee tables. A small coffee table that adds a little bit of elegance and ethnicity can transform the ambiance of the living area. Royaloak stocks a wide range of tables that match Indian decor. This product enhances your home’s appearance with its high-quality materials, such as solid timber and glass or colored metal.

You can also find the sofa center table and the nested coffee table. They are made from high-quality materials and have modern designs. It is as useful as your favorite sofa, and you can also use it to make coffee at the coffee table.

Bedroom Furniture

People’s bedrooms are the most important space in which they get a good night’s rest. It is also the most important space in which you spend the majority of your time. Therefore, it is crucial to select the right products. The basic components of a bedroom are a bed, dressing table, wardrobe, and small furniture such as a side table and bookshelves.

When To Remodel Or Change A House

Are you remodeling or changing a home? If so, you might feel your old furniture is not appropriate for the new space. This is when new furniture will be important to you. You can also buy additional furniture depending on the space. The most important furniture you need for your home is bedroom furniture.

Living Standards

The appearance of your home’s interior is what guests and visitors first notice when they visit. You can enhance the interior of your home by choosing attractive furniture and matching its functionalities and design. You can create a relaxing atmosphere in your living room with quality furniture such as a modern sofa or recliner, a center table, storage unit, or TV unit. Furniture with quality not only gives your home a beautiful look but also adds value. You can personalize your home by choosing furniture and interior decor that reflect your style and lifestyle.

Furnishings For Personal Comfort

This concept is no longer relevant. In the past, comfortable furniture was reserved for elderly parents. Comfort can be achieved at any age. You should consider a sofa with a deeper seat if you have back issues or are suffering from bad knees. Also, it is important to change your mattress.

While Working From Home

Companies and individuals have had to move to remote work due to the recent pandemic. For the ultimate home office, it is necessary to have a section of Work from Home furniture. It is important to create a professional office environment when working remotely.

Categories: Home Improvement